How to Install a PoE Security Camera
A PoE camera install is five real steps: mount the housing at a settled height and angle, run a certified solid copper Cat5e or Cat6 cable within the 100 metre ANSI/TIA-568 limit, terminate both ends into keystone jacks, connect to a PoE switch port sized for the camera's power class, then confirm the camera negotiates power and picks up an IP address before sealing any outdoor termination.
Installing a PoE camera is straightforward once the planning is done, and most of the planning is covered by three other guides on this site: where the camera should point, how high and at what angle it should be mounted, and what the cable run needs to look like. This guide walks through the physical steps that turn that planning into a working camera.
Every step below rests on the same standards covered elsewhere on this site, the IEEE 802.3 PoE classes and the ANSI/TIA-568 100 metre channel, and none of it is a substitute for reading the specific camera's own installation manual for mounting hardware and connector types.
Doing the steps in this order matters more than it might seem: mounting before the cable path is planned, or powering the camera before the run is tested, both tend to turn a small mistake into one that has to be undone through a finished wall or a sealed junction box.
| Step | What to check before moving on |
|---|---|
| Mount the housing | Solid framing or masonry, correct fasteners, weatherproof gasket |
| Run the cable | Solid bare copper, environment-rated jacket, total run under 100 m |
| Terminate both ends | Punch-down keystone jacks, not a crimped RJ45 on solid core |
| Test the run | Cable tester confirms continuity and measured length |
| Power the camera | Switch or injector port rated for the camera's PoE class |
| Configure and secure | Reserved IP or NVR binding, default password changed, firmware updated |
| Symptom | Likely cause |
|---|---|
| Intermittent dropout on one camera channel | Over-length or badly terminated cable run on that channel |
| Camera reboots or browns out under load with others | Switch PoE budget undersized for the total camera class load |
| Link negotiates at 100 Mbps instead of gigabit | Cable length or termination fault, often near the 100 m limit |
What to decide before drilling a single hole
Confirm the entry point coverage and rough mounting height and angle first; drilling into siding or brick is far more forgiving to redo on paper than in the wall. Plan the cable path from that mount point back to the switch location, including how much slack to leave for a drip loop and for reaching a junction box.
Check the camera's power class against the switch or injector it will land on before running any cable, since that decision affects nothing about the cable itself but everything about whether the port at the far end can actually power the camera once it is up.
Confirm the mounting height and angle against the guide covering that topic before settling on a final spot, since moving a mount a metre lower or further back from a door often changes the resulting face angle more than any other single decision in the install.
Mounting the housing
Secure the mounting bracket or junction box to solid framing or masonry rather than siding alone, using the fasteners the manufacturer supplies for the wall type. A junction box behind the camera gives a clean place for the cable termination to sit protected from weather rather than exposed at the back of the housing.
Fit a gasket or weatherproof seal between the bracket and the wall on any exterior mount, and check that the housing itself is rated for outdoor exposure if it will not sit under cover.
Level the housing before final tightening rather than eyeballing it after the fasteners are already snug; a camera mounted a few degrees off level shows up clearly in the recorded image as a tilted horizon, which is easy to avoid and awkward to fix once the bracket is fully secured.
Running and terminating the cable
Run solid bare copper cable rated for the environment it passes through, keeping the whole channel, including patch leads at both ends, under the 100 metre ANSI/TIA-568 limit. The running cable guide covers cable ratings and the reasoning behind that limit in more depth than fits here.
Terminate both ends into keystone jacks with a punch-down tool rather than crimping solid-core cable directly onto an RJ45 plug, and test the finished run with a cable tester for continuity and measured length before connecting the camera.
Leave extra slack at both ends of the run rather than pulling it drum-tight, since a small amount of give makes it possible to re-terminate a connector later without pulling more cable through the wall from scratch.
Powering the camera
Connect the terminated cable to a PoE switch port, or a standalone PoE injector, rated for at least the camera's power class. A camera rated 802.3at class 4 needs a port that can deliver the full 30 W PSE budget for that class, not just a port that happens to be labeled PoE.
On a switch already carrying several other PoE cameras, check the switch's total PoE budget against the sum of every camera's class on that switch, not just the new camera in isolation; the PoE power budget calculator runs that sum for a specific mix of cameras.
Most cameras and switches show a link light and a separate PoE status indicator once connected; both should be active within a short time of plugging in, and a PoE indicator that never lights up points back at the switch port budget or the cable run rather than the camera's configuration.
Configuring the camera on the network
Most cameras either bind directly to an NVR channel or get discovered by a phone app and assigned a reserved or static IP address on the router, depending on the system. Assigning a reserved address rather than leaving it on a dynamic lease avoids the camera silently changing address after a router reboot and dropping out of an NVR's channel list.
Change the camera's default password immediately, before it is exposed on the network for any length of time, and check for and apply a firmware update at the same time rather than leaving that for later.
If the household plans to record continuously to an NVR rather than relying on a phone app alone, confirm the camera actually shows up as an available channel on the recorder before considering the install finished, since a camera that only streams to an app is a different setup than one bound to an NVR channel.
Weatherproofing and strain relief
Leave a drip loop in the cable just before it enters the housing or junction box, so water running down the cable drips off at the low point of the loop instead of following the cable straight into the connector. Use outdoor-rated RJ45 connectors or a sealed junction box for any termination that is not fully protected from rain.
Secure the cable along its run with clips rather than leaving it to hang or flex against an edge, which over time is a common cause of a connector working loose or a jacket wearing through at a single contact point.
Silicone sealant around any drilled entry point into the wall or soffit keeps water from tracking along the outside of the cable jacket into the wall cavity, which is a separate concern from the cable's own weather rating and easy to miss on an otherwise careful install.
Safety notes for anything touching mains power
The PoE camera and its low-voltage cable run are not mains electrical work and do not require an electrician on their own. That changes the moment the install includes a floodlight or spotlight fixture wired into the household electrical circuit rather than just a PoE camera on its own cable; wiring into mains power is licensed electrician work in many places and is worth confirming locally before attempting it.
Never share a junction box or conduit between low-voltage camera cable and mains wiring in a way that could let the two make contact; keep them physically separated per local electrical code.
When in doubt about whether a specific piece of work counts as mains electrical work under local code, the safer default is to treat it as licensed work and confirm with a local electrician rather than assume a low-voltage exception applies.
The gear that matches this answer

REOLINK RLC-810A PoE Security Camera, 4K Wired Outdoor
$84.99The default 4K PoE bullet in this catalog: person and vehicle detection on the camera itself, so alerts are not triggered by every passing shadow.
- Resolution
- 8 MP
- Lens
- 4 mm
- Storage
- PoE, needs an NVR or NAS
Prices change often.

Universal Bullet Security Camera Junction Box Mount Bracket, Rainproof
$15.99The connector is the part that fails outdoors, and a junction box is the cheapest way to keep it dry and out of sunlight.
Check price on AmazonPrices change often.

Klein Tools VDV526-100 Network LAN Cable Tester with Remote
$21.00The cheapest tester worth owning, and it catches the split pair and reversed pair faults that make a camera connect at 100 Mbps and then drop under load.
Check price on AmazonPrices change often.
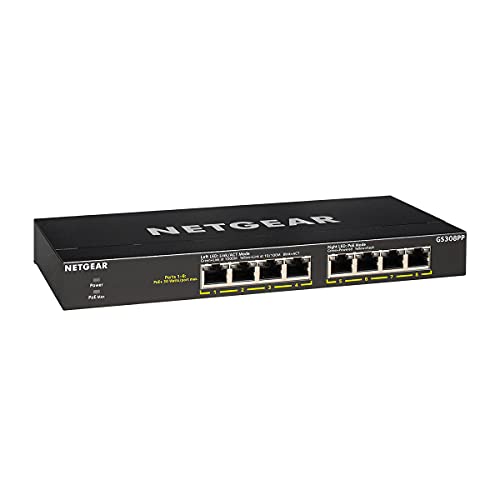
NETGEAR 8-Port PoE Gigabit Ethernet Unmanaged Network Switch GS308PP
$69.99An 83 W budget across eight PoE ports, which carries six to eight class 3 cameras with the headroom that stops a switch shutting a port down on a cold night when the heaters run.
- PoE ports
- 8
- PoE budget
- 83 W
- PoE standard
- 802.3af/at
Prices change often.

compcctv Security Camera Mount Bracket, Aluminum Indoor Outdoor Wall Mount L-Type
$19.99Aluminium rather than plastic, for a camera that has to stay aimed through a winter of wind loading.
Check price on AmazonPrices change often.
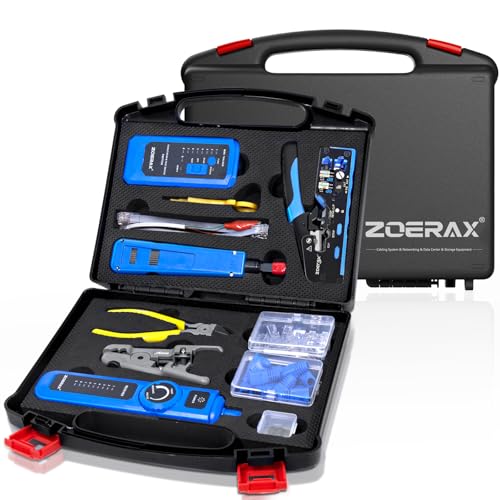
ZOERAX 14 in 1 Professional Network Tool Kit with Crimp Tool and Connectors
$64.99Crimper, punch down tool, stripper, tester and connectors together, which is everything a first camera install needs in one purchase.
Check price on AmazonPrices change often.
Common questions
Do I need an electrician to install a PoE camera?
Not for the camera or its low-voltage PoE cable, which carry standard PoE current rather than household mains power. An electrician becomes necessary the moment the job includes wiring a floodlight, spotlight, or any fixture directly into the household electrical circuit, since that work is licensed electrician territory in many places.
Can I install a PoE camera without an NVR, using just a switch and an app?
Yes, many PoE cameras can be viewed and configured through a phone app without an NVR, recording either to a microSD card in the camera or nowhere at all if only live viewing is wanted. An NVR becomes worthwhile once continuous recording, longer retention, or several cameras on one interface matter more than the simplicity of a switch-only setup.
What does it mean if a camera does not get an IP address after install?
It usually points to either a PoE power problem, meaning the camera never fully powered on to request an address, or a cable problem, meaning the data signal is not reliably reaching the switch. Checking the switch's PoE port status and testing the cable run for continuity and length are the first two things to check before assuming the camera itself is faulty.
Should I use a PoE injector or a PoE switch?
A PoE switch is the better choice for several cameras, since it centralizes power budgeting and networking in one place. A standalone PoE injector makes sense for a single camera that is not near an existing PoE switch, adding power to an ordinary network connection without needing to replace or add a switch just for that one camera.
How soon should I change a new camera's default password?
Before it is left connected to the network unattended, ideally as the very last step of the install before walking away. A camera left on its default credentials, even briefly, is discoverable by automated scanning tools looking specifically for that pattern, and the risk does not require the camera to be internet-exposed on its own to matter.
Get the system planning sheet
The camera count, storage and PoE budget worksheet, plus the wiring checklist, as one printable page.
Keep going
Before you point a camera at anything. Aim cameras at your own property and your own boundary, never into a neighbour's windows or across their garden. Cameras in bedrooms, bathrooms, or anywhere else a person reasonably expects privacy are a serious legal problem, and that includes guests, lodgers and anyone who works in your home. Audio is legally different from video, many US states require the consent of every party to a recorded conversation, and several recorders capture audio by default, so check your own state before you enable it. Some places require visible notice that recording is taking place, and landlords and homeowner associations often impose their own rules on top. This is researched general information and not legal advice, and the law varies by state and by country.
And once it is installed. Change every default password, keep the firmware updated, and be clear with yourself about where the footage goes: a cloud camera means a third party holds recordings of your home, while a local recorder keeps them in your house. That is a genuine buying consideration, not a technicality.
A local NVR rather than a cloud plan keeps the resulting footage on hardware in the house instead of on a third party's servers, which is worth weighing at install time, not after months of a cloud subscription.